Generating a Quicken report for this — one which shows your categorized spending broken down into, say, a monthly basis — isn't tough at all. And because Quicken lets you easily export the data to an Excel-readable format, your ability to crunch numbers is limited only by the amount of free time you have to kill doing it. Ahem.
Getting a suitable monthly-spending comparison starts, as you'd expect, with Quicken's "Reports" menu in the toolbar. (I'm using Quicken 2008 Deluxe [my review] here, by the way.) From the toolbar, follow the menu tree like so:
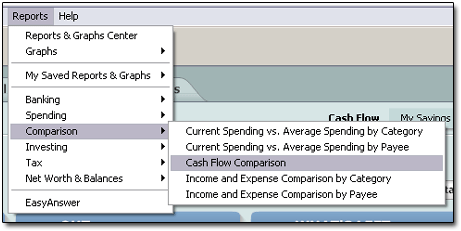
... choosing REPORTS → COMPARISON → CASH FLOW COMPARISON.
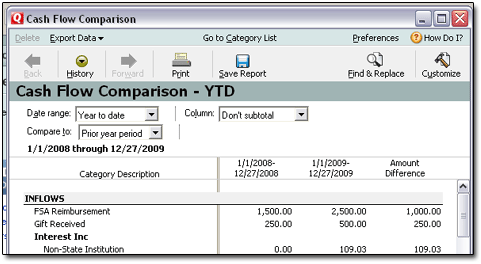
This brings up Quicken's default spending comparison report, "Cash Flow Comparison - YTD." It shows all your income and spending for the current year, categorized nicely, annualized and compared against last year's spending.
What if you wanted to see your spending in just one big category ... say, "Food," which in my case includes both groceries and dining out? You don't care about all the other stuff Quicken spits out.
Swing over to the CUSTOMIZE button on the right side. Click that. Then, in the window that appears, click the CATEGORIES tab. Click the CLEAR ALL button to reset your category-reporting selections. Now find the category or categories you want ("Food" in my case) and check-mark them.
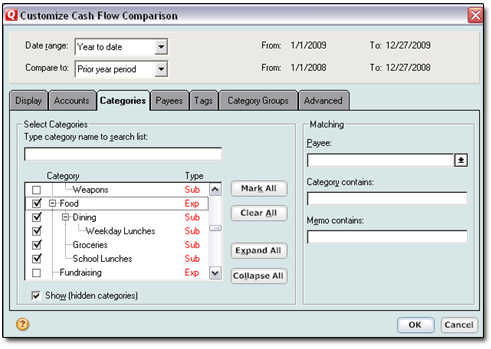
Then click the OK button at the bottom.
Now, since we want to see each month's food expenses for this year, and then compared to the same monthly periods from a year earlier, we need to change some of the drop-downs at the top of the report window. The changes to make are shown here with yellow arrows:
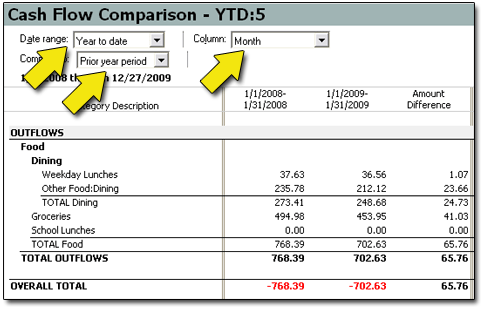
For "Date Range," we want "Year to date."
For "Compare to," select "Prior year period."
And for the "Column" option, select "Monthly."
After these changes, the Quicken spending report for category "Food," plus all subcategories, now shows two years' worth of our food expenses, broken down monthly. Each month of this year is compared to its year-ago period. (Note that such a report spans quite a bit of space to the right, as evidenced by the scroll bars Quicken offers at the bottom of the report window.)
While you've likely got all the data you're needing right there in the Quicken report itself, I tend to prefer to see such data in Excel. If your version of Quicken is at all recent, it's a small matter at this point to dump (or "export," if you're in polite company) the report into an Excel-readable format.
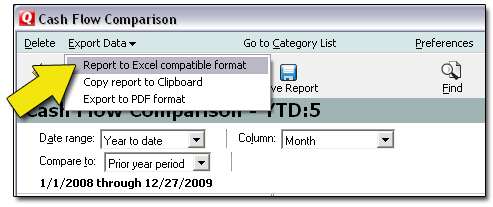
In the report menubar, select EXPORT DATA → EXPORT TO EXCEL COMPATIBLE FORMAT. Then tell Quicken where you want the text file (.txt) to be saved. (I'm a desktop kind of guy, myself.)
Now open Excel. In XL2007, click the colorful Office button, and then OPEN. In earlier versions, select FILE → OPEN.
In the OPEN window, under "FILES OF TYPE:" select the "ALL FILES (*.*)" option.
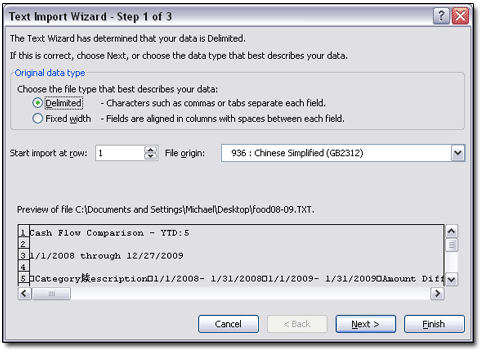
Now direct Excel to open the text file you created moments ago. Excel will automatically open its three-step, text-import wizard. The wizard then guides you through the stupid-easy process of bringing your delimited text file (.txt) into a much fancier, more-number-crunchier Excel file (.xls or .xlsx).
Set your columns and formatting, and otherwise play your cards right, and you'll have a chock-full-of-Quicken-data Excel spreadsheet with numbers ready to be crunched six ways to Sunday!
