
Windows: Removing READ-ONLY Status from a File
Every so often, a reader who's downloaded one of my spreadsheets will email me with a problem: He can't save his changes to the spreadsheet, as Windows tells him it's a "read-only" file.
This can be caused by two things:
- The file came in a ZIP file that was never extracted; or
- Windows automatically assigned a READ-ONLY status to a file when it was first downloaded.
So first, if the spreadsheet(s) you're using came inside a ZIP file, make sure you actually "extracted" the file(s). Read my "Extracting a ZIP File" tutorial for a detailed walk-thru of this procedure.
Removing READ-ONLY Status From a File
When Windows assigns a file "READ-ONLY" status (why it does this, I don't know), you'll need to manually change the file's PROPERTIES in order to be able to save your changes to it.
Don't worry — it's easy!
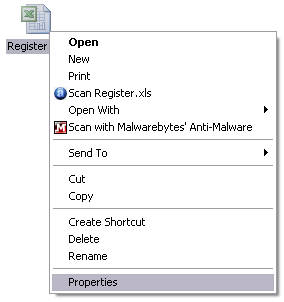
Locate the file you need to modify. If you're like me, you download most files right to your desktop. In my "example" case, I need to change the file properties of a spreadsheet file named "Register.xls":
Your file's name will be different, of course.
Now right-click the chosen file. In the drop-down menu which appears, select PROPERTIES. Like so:
A new window now appears. Look at the bottom, in the "Attributes" section. The READ-ONLY box is probably checked:
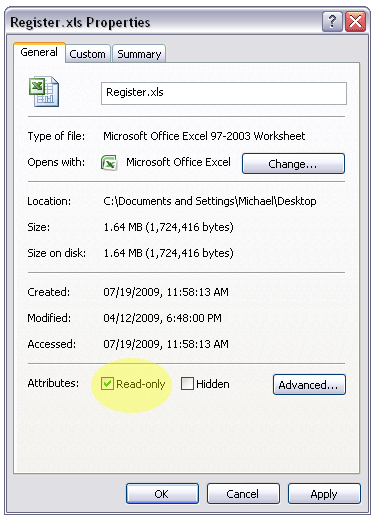
Uncheck that box, and then click the APPLY button. Then click the OK button.
That should do it! Your file is no longer "read-only," and you can save changes to your heart's content. See? Not tough at all! 